
Whether you are buying a new outside pen, building one from scratch or reconstructing an old one, as a dog owner, you can be able to create a superior final product by following imperative tips and guidelines that have been developed through the experiences of other canine takers.
 The main disadvantage of placing the dog pen at a remote location is that it can be a little bit difficult to control unnecessary barking because the long distance trips not only makes the correction inconvenient but also time consuming. Furthermore, if you are going to require lights for both security and heating purposes, electrical service must be included in the final budget. The security lines are very important especially if you are going to make long trips from the house to the dog pen.
On the other hand, locating a dog pen in a close proximity has its proven benefits and disadvantages. When the construction is located closer to the house, the dog owner can be able to control nuisance barking by just using voice commands. In addition, pen clean-up is also going to be very easy since water sources can be easily accessed. All in all, it is highly advisable to always keep the dog house at a striking distance from safety and security issues.
The main disadvantage of placing the dog pen at a remote location is that it can be a little bit difficult to control unnecessary barking because the long distance trips not only makes the correction inconvenient but also time consuming. Furthermore, if you are going to require lights for both security and heating purposes, electrical service must be included in the final budget. The security lines are very important especially if you are going to make long trips from the house to the dog pen.
On the other hand, locating a dog pen in a close proximity has its proven benefits and disadvantages. When the construction is located closer to the house, the dog owner can be able to control nuisance barking by just using voice commands. In addition, pen clean-up is also going to be very easy since water sources can be easily accessed. All in all, it is highly advisable to always keep the dog house at a striking distance from safety and security issues.
 Apart from concrete, there is also another flooring option that is preferred by some dog owners and breeders. Unlike concrete and steel which may cause worn pads, painful joints and slayed toes over a long period of time, sand stone’s irregular shapes plays a bigger role in assisting the dog develop strong jaws. But before placing the sand stones, you should first consider installing an ideal sand base for drainage purposes. You should also consider laying down landscape fabric so that you can be able to prevent weed growth.
 If your pet is a digger, then you are going to insert a 2 by 12 direct burial beneath the fence. Alternatively, you can bury the fence itself 1 foot under the soil. The methods discussed above are not fool proof, but they are always going to prevent your pet from escaping. To ensure maximum security, you can also screen off any of the sides that may be facing the sidewalks or streets by placing privacy slats on the fence. This is going to cut down on the overall stress and barking.
Things to consider when building a dog pen
1. Selecting a suitable location
Choosing an ideal location is usually the first and most important step when you are building a dog pen. The location is very important because it directly contributes to the overall design of the structure and also influences the choice of methods of construction and materials that will be used in the production of the final product. There are many dog pen ideas to choose from. A dog pen that is going to be located far away from the house will unquestionably have different features when compared to a dog pen that is directly connected to the owner’s house or car garage. Each location that a dog owner is going to choose will have its benefits and drawbacks hence will require a little bit of attention before the process of construction begins. For dog owners who are looking for viable ways of separating people from dog noises, dog odor and flies then placing the dog house several yards from the owner’s house is one of the reliable ways.
The main disadvantage of placing the dog pen at a remote location is that it can be a little bit difficult to control unnecessary barking because the long distance trips not only makes the correction inconvenient but also time consuming. Furthermore, if you are going to require lights for both security and heating purposes, electrical service must be included in the final budget. The security lines are very important especially if you are going to make long trips from the house to the dog pen.
On the other hand, locating a dog pen in a close proximity has its proven benefits and disadvantages. When the construction is located closer to the house, the dog owner can be able to control nuisance barking by just using voice commands. In addition, pen clean-up is also going to be very easy since water sources can be easily accessed. All in all, it is highly advisable to always keep the dog house at a striking distance from safety and security issues.
2. Proper materials
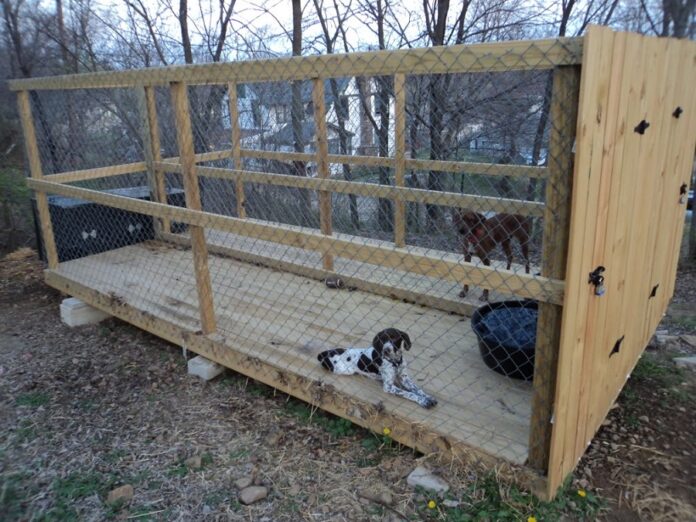
Any run for an outside dog should be 12 feet or more in length and 48 inches long. This is mainly used as the standard measure and the reason these dimensions are used is to encourage dogs to defecate and urinate naturally at the far most end of the run which is usually the farthest location from the kennels door and the door of the house. Furthermore, kennel run floors must be designed with a slope so that water may run off so as to avoid running puddles. A good kennel design should also include a dry well which is 48 inches wide and 3 foot deep at the far end and must be filled with stones that are 3 to 4 inches in diameter. A dry well is a place where wash water drains and collects and in the process odor is minimized while insects cannot get access to the residues in urine and feces.3. Floors and walls
Concrete is usually the most used flooring material. There are other flooring materials such as gravel which is less expensive but picking up of feces on such floors is sometimes difficult and close to impossible. There are also other options such as wood and steel. All in all, despite the fact that the initial installation cost of concrete is usually a little bit higher, the result is usually a tougher and longer lasting floor. It is also important to note that with time the concrete is going to crack due to extremes in temperatures. However by using reinforcement such as wire and rebar and high quality cement most of this can be controlled. Furthermore, you can also include a gravel under layer which will play a vital role in preventing the concrete floor from cracking.
Apart from concrete, there is also another flooring option that is preferred by some dog owners and breeders. Unlike concrete and steel which may cause worn pads, painful joints and slayed toes over a long period of time, sand stone’s irregular shapes plays a bigger role in assisting the dog develop strong jaws. But before placing the sand stones, you should first consider installing an ideal sand base for drainage purposes. You should also consider laying down landscape fabric so that you can be able to prevent weed growth.
4. Fencing options
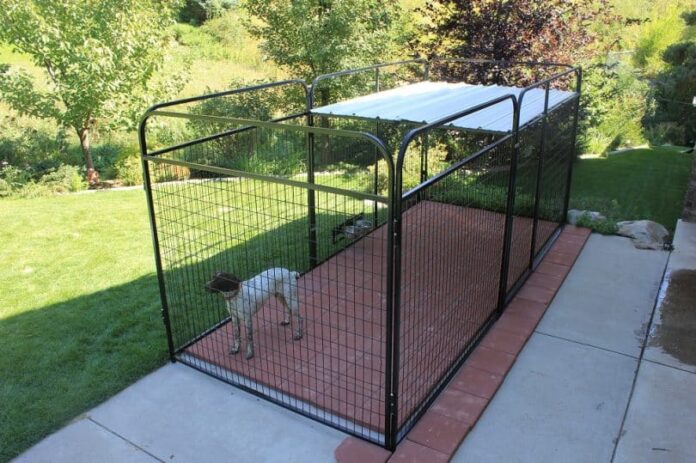
Chain linking has always been the most preferred fencing option for both inside and outside dog pens. Unlike other fencing designs, chain linking is usually very simple to install, readi9ly available, very affordable, durable for a long duration of time and very efficient to use. In addition, welded wire that has a powdered coating is usually a preferred option because it is resistant to dog teeth and urine. But just like concrete the initial installation cost is a little bit extreme when compared to other fencing options. However, the overall resistant to rust and wear makes chain linking a cost effective option. With that being said many dogs will spend close to 95 per cent of their lives training or waiting for an outside run and as such it is our duty as dog owners to make their living environment as clean and comfortable as we can. By observing all of the above suggestions, you are going to be able to provide your dog with a dog pen that he or she is going to be happy to call a home.
If your pet is a digger, then you are going to insert a 2 by 12 direct burial beneath the fence. Alternatively, you can bury the fence itself 1 foot under the soil. The methods discussed above are not fool proof, but they are always going to prevent your pet from escaping. To ensure maximum security, you can also screen off any of the sides that may be facing the sidewalks or streets by placing privacy slats on the fence. This is going to cut down on the overall stress and barking.
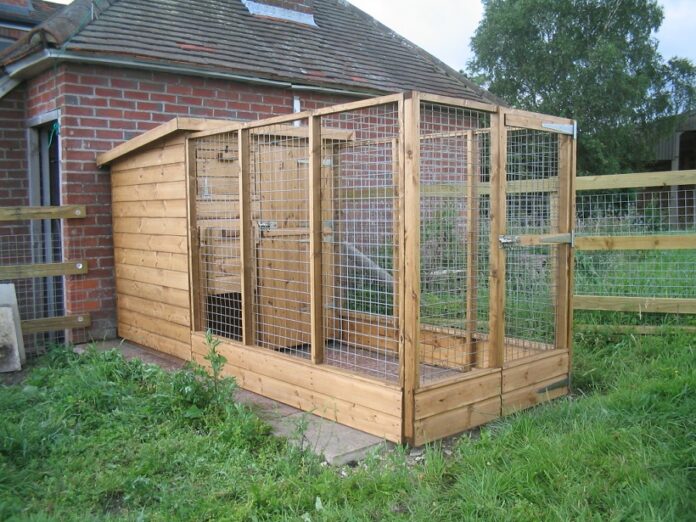
5. Planning for the dog house and shading
Any dog that is to spend his or her day outside requires adequate shading from weather elements. A dog pen is not usually a mandatory requirement but if you are going to build one, you should at least ensure that you have installed a windbreak and a small roof. Despite the fact that dogs may withstand a certain level of cold, excess rains and winds can be harmful and detrimental to your pet’s health. You can achieve this by installing an elevated coat which will play a huge role in searing the hot floor or preventing your pets from freezing.
It is also important to provide another shaded area for the dog apart from the dog pen. When installing the dog house, you should avoid placing it in a corner. This is a very common DIY mistake because most dogs will use the pen’s roof as a launching pad to jump over. Instead of placing it in a corner, you should consider placing it a few meters from the corner.
 If the corner is the only available place, then you should at least make the fence a little bit higher so as to prevent jump outs.
 After measuring and marking the desired spots, the subsequent step involves the digging of holes. These holes should be about 2 feet deep and about 3 inches by 3 inches in diameter for each of the corners. Furthermore, you should also dig two additional holes for the kennel’s gate.
For the second process, you are supposed to dig a total of six holes. In the next step, you are required to pour cement into the holes. When preparing the cement, you are required to mix the cement powder with water by following the instructions on the cement bag. Cement mixture bags can be purchased at hardware stores and home centers.
In the fourth step, you are required to install the wooden fence posts into the corner holes while the cement mixture is still wet. Pre-cut wooden posts can be purchased at wood supply stores, hardware stores, and home centers at affordable rates. The pre-cut wooden posts are going to be used for the dog pen corners. Before selecting the wooden posts, ensure that the height of the post matches the height of the desired dog pen. Constructing a dog pen for a small-sized dog usually demands a slightly lower kennel compared to that of a large dog or a pet that likes to jump.
After measuring and marking the desired spots, the subsequent step involves the digging of holes. These holes should be about 2 feet deep and about 3 inches by 3 inches in diameter for each of the corners. Furthermore, you should also dig two additional holes for the kennel’s gate.
For the second process, you are supposed to dig a total of six holes. In the next step, you are required to pour cement into the holes. When preparing the cement, you are required to mix the cement powder with water by following the instructions on the cement bag. Cement mixture bags can be purchased at hardware stores and home centers.
In the fourth step, you are required to install the wooden fence posts into the corner holes while the cement mixture is still wet. Pre-cut wooden posts can be purchased at wood supply stores, hardware stores, and home centers at affordable rates. The pre-cut wooden posts are going to be used for the dog pen corners. Before selecting the wooden posts, ensure that the height of the post matches the height of the desired dog pen. Constructing a dog pen for a small-sized dog usually demands a slightly lower kennel compared to that of a large dog or a pet that likes to jump.
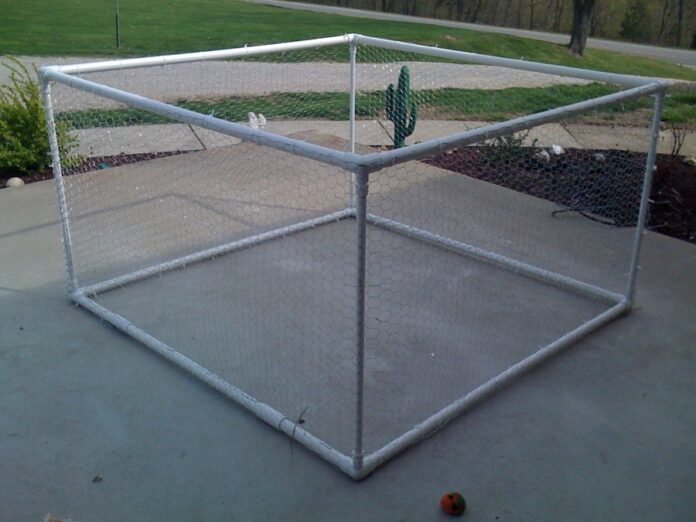
 Once you have successfully installed the wooden fence posts into the corner holes, you will now lay the chicken wire along the perimeter of the dog pen. While laying the chicken wire, you can use bricks to hold the chicken wire in place. This is very important because it is going to prevent your pet from digging underneath the fence.
After you have laid the chicken wire, you will then cut the chain link fence according to the appropriate length on each of the sides of the dog pen. While cutting, you should at least leave an extra 6-8 inches to spare. Run each of the chain link pieces from post to post.
Finally, you should tie the chain link to the post by using fence ties and pliers. This can be achieved by twisting the ends of the fence together. While installing the chain link, it is very important to ensure that you have left an opening for the gate on the side that you would have chosen.
Screw the two hinge assemblies on one of the gateposts of the dog pen. Begin by measuring the spot where the hinges will be hanging, then match them with the hinge locations on the pen’s gate. After you have matched the hinge assemblies to the suitable hinge assemblies, you should then attach the hinge assemblies to the exact locations by using a screw gun. You can always employ the use of screw guns to hold the hinge assembly in its rightful place.
Hang now the gate on the post hinges, by sliding the gate hinges on top of the hinge assembly that has been mounted on the pen’s gatepost. The most suitable gate is a full-length gate because it is going to prevent the dog from crawling under it.
Once you have successfully installed the wooden fence posts into the corner holes, you will now lay the chicken wire along the perimeter of the dog pen. While laying the chicken wire, you can use bricks to hold the chicken wire in place. This is very important because it is going to prevent your pet from digging underneath the fence.
After you have laid the chicken wire, you will then cut the chain link fence according to the appropriate length on each of the sides of the dog pen. While cutting, you should at least leave an extra 6-8 inches to spare. Run each of the chain link pieces from post to post.
Finally, you should tie the chain link to the post by using fence ties and pliers. This can be achieved by twisting the ends of the fence together. While installing the chain link, it is very important to ensure that you have left an opening for the gate on the side that you would have chosen.
Screw the two hinge assemblies on one of the gateposts of the dog pen. Begin by measuring the spot where the hinges will be hanging, then match them with the hinge locations on the pen’s gate. After you have matched the hinge assemblies to the suitable hinge assemblies, you should then attach the hinge assemblies to the exact locations by using a screw gun. You can always employ the use of screw guns to hold the hinge assembly in its rightful place.
Hang now the gate on the post hinges, by sliding the gate hinges on top of the hinge assembly that has been mounted on the pen’s gatepost. The most suitable gate is a full-length gate because it is going to prevent the dog from crawling under it.
 In the ninth step, you will now affix a latch on the gate by using a matching latch attachment on the gatepost. Finally, you should lay a tarp on one of the rear-end corners of the kennel for shade. Always ensure that the dog is provided with a continuous supply of fresh and clean drinking water.
As you can see, with a little bit of skill and will and with the right instructions, a dog pen can be built in just one weekend. Even more, it can be a fun DIY project for the entire family!
It cements the connection between the dog and its owner, who end up having a bond that stays strong for many years to come.
For more projects like a dog pen that can help turn your yard into a safe and fun place for your pets, please see the resource below.
In the ninth step, you will now affix a latch on the gate by using a matching latch attachment on the gatepost. Finally, you should lay a tarp on one of the rear-end corners of the kennel for shade. Always ensure that the dog is provided with a continuous supply of fresh and clean drinking water.
As you can see, with a little bit of skill and will and with the right instructions, a dog pen can be built in just one weekend. Even more, it can be a fun DIY project for the entire family!
It cements the connection between the dog and its owner, who end up having a bond that stays strong for many years to come.
For more projects like a dog pen that can help turn your yard into a safe and fun place for your pets, please see the resource below.
If the corner is the only available place, then you should at least make the fence a little bit higher so as to prevent jump outs.
The building process: things that you will need
- Chain link fencing
- Tape measure
- Chicken wire
- Wood stakes- 2 by 4 inches
- Wire cutters
- Screw gun
- Door Hinges
- Gate
- Hinge Assembly
- Wood screws
- 6 wooden posts each measuring 2 inches wide
Instructions
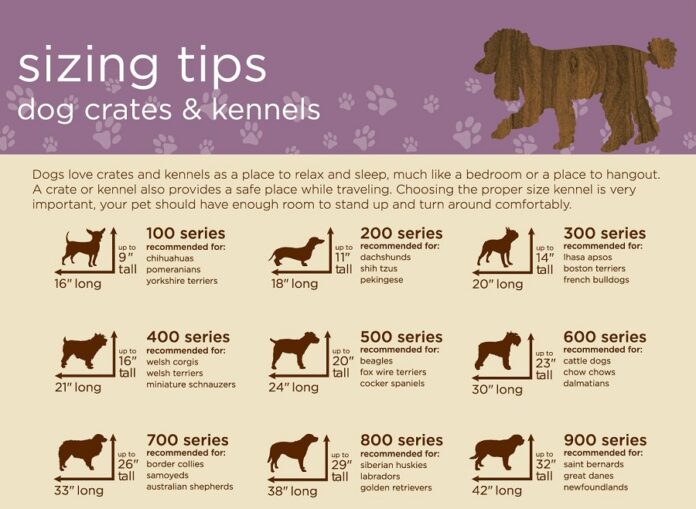
The first step when designing a homemade dog pen is to measure and mark the desired area where you have selected to install the pen. Begin by marking the spots that are designated for the corners by using stakes together with the designated spot for the gate. Before you begin construction, you should use your pet’s size together with the amount of money that you will be willing to spend as a guide for the pen size. Furthermore, the amount of time that the pet will be spending in the kennel also has an impact on the size. If you are planning to confine your pet to the kennel during night hours only or for sleeping purposes, then you are not going to need a large dog pen. Another important tip that might save you lots of cash is to always build a pen that is not larger than necessary.
After measuring and marking the desired spots, the subsequent step involves the digging of holes. These holes should be about 2 feet deep and about 3 inches by 3 inches in diameter for each of the corners. Furthermore, you should also dig two additional holes for the kennel’s gate.
For the second process, you are supposed to dig a total of six holes. In the next step, you are required to pour cement into the holes. When preparing the cement, you are required to mix the cement powder with water by following the instructions on the cement bag. Cement mixture bags can be purchased at hardware stores and home centers.
In the fourth step, you are required to install the wooden fence posts into the corner holes while the cement mixture is still wet. Pre-cut wooden posts can be purchased at wood supply stores, hardware stores, and home centers at affordable rates. The pre-cut wooden posts are going to be used for the dog pen corners. Before selecting the wooden posts, ensure that the height of the post matches the height of the desired dog pen. Constructing a dog pen for a small-sized dog usually demands a slightly lower kennel compared to that of a large dog or a pet that likes to jump.
Once you have successfully installed the wooden fence posts into the corner holes, you will now lay the chicken wire along the perimeter of the dog pen. While laying the chicken wire, you can use bricks to hold the chicken wire in place. This is very important because it is going to prevent your pet from digging underneath the fence.
After you have laid the chicken wire, you will then cut the chain link fence according to the appropriate length on each of the sides of the dog pen. While cutting, you should at least leave an extra 6-8 inches to spare. Run each of the chain link pieces from post to post.
Finally, you should tie the chain link to the post by using fence ties and pliers. This can be achieved by twisting the ends of the fence together. While installing the chain link, it is very important to ensure that you have left an opening for the gate on the side that you would have chosen.
Screw the two hinge assemblies on one of the gateposts of the dog pen. Begin by measuring the spot where the hinges will be hanging, then match them with the hinge locations on the pen’s gate. After you have matched the hinge assemblies to the suitable hinge assemblies, you should then attach the hinge assemblies to the exact locations by using a screw gun. You can always employ the use of screw guns to hold the hinge assembly in its rightful place.
Hang now the gate on the post hinges, by sliding the gate hinges on top of the hinge assembly that has been mounted on the pen’s gatepost. The most suitable gate is a full-length gate because it is going to prevent the dog from crawling under it.
In the ninth step, you will now affix a latch on the gate by using a matching latch attachment on the gatepost. Finally, you should lay a tarp on one of the rear-end corners of the kennel for shade. Always ensure that the dog is provided with a continuous supply of fresh and clean drinking water.
As you can see, with a little bit of skill and will and with the right instructions, a dog pen can be built in just one weekend. Even more, it can be a fun DIY project for the entire family!
It cements the connection between the dog and its owner, who end up having a bond that stays strong for many years to come.
For more projects like a dog pen that can help turn your yard into a safe and fun place for your pets, please see the resource below.

 You may be wondering what those breeds are and if you’re feeling a little lost right now, don’t worry. We did the research for you and found you the 15 best farm dogs in both herding and livestock guarding. Now, before we start talking about the different breeds, you need to consider a couple factors if you want to choose the right dog your farm.
 Now that you thought about these factors, it’s time that you learned the 15 types of farms dogs that are most commonly used for farm work. Each breed has its advantages and disadvantages, of course, nothing is perfect. However, this list is going to provide you with the best dogs for your farm. Let’s take a closer look.
 Border Collies love herding sheep and they’re the smartest dog of all the breeds, maybe even smarter than you. And from them being extremely intelligent, they’re incredibly obedient and grounded. You won’t have to worry about them making any irrational decisions because that’s simply not in their nature. They’re not a breed that needs to be babied and overlooked.
 Another thing is that they’re droolers, so having a couple old towels lying around is probably a good idea. Other than that though, they’re amazing dogs and will be able to carry out a multitude of different tasks.
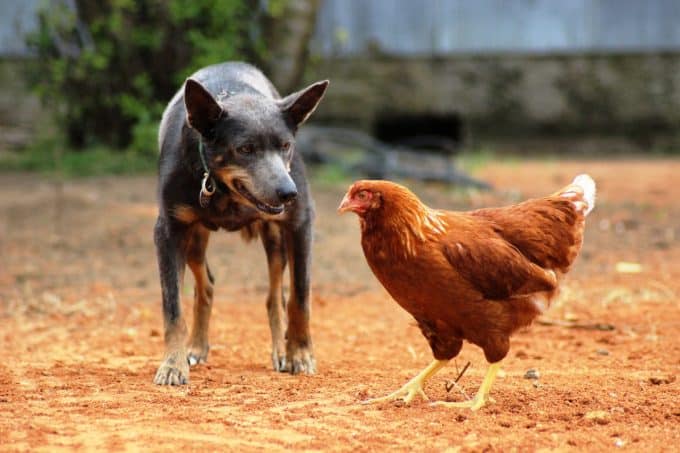
 They’re not loud dogs, however, their cautious personalities makes them amazing at protecting the home. They’re easy to train, however, do need a strong owner to show them who’s boss. However, once they understand where their place is in the home, they’re absolutely lovely dogs to have around.
They do have a tendency to nip, however, so make sure you have a toy handy. Make sure it’s a strong toy as they’re able to rip through one without hesitation. If you have a ranch or farm, they’ll make a great addition to your home and will love every minute of it.
They’re not loud dogs, however, their cautious personalities makes them amazing at protecting the home. They’re easy to train, however, do need a strong owner to show them who’s boss. However, once they understand where their place is in the home, they’re absolutely lovely dogs to have around.
They do have a tendency to nip, however, so make sure you have a toy handy. Make sure it’s a strong toy as they’re able to rip through one without hesitation. If you have a ranch or farm, they’ll make a great addition to your home and will love every minute of it.
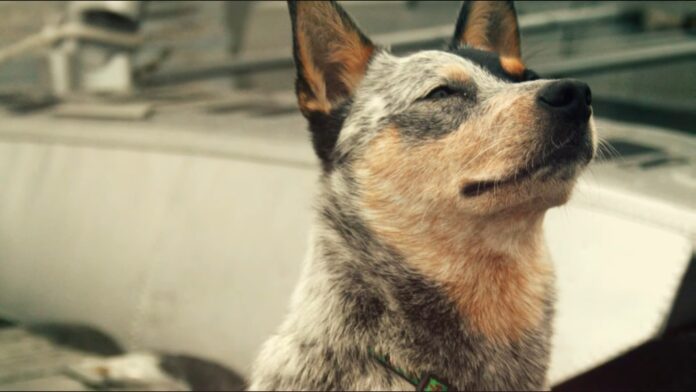
 They are reserved around new people, however, with time, they settle down and become more comfortable around people. They’re not fans of staying inside, so if you do keep them inside for a lengthy period of time, you can expect them to get a little crazy.
 They’re not ideal for long round-ups because of their size, however, if you’re simply needing a dog for around the farm, they’re great additions to the family. They may nip your heels as that’s what they do to the livestock in order to move them into the right direction.
However, generally, they’re bubbly, loyal, hard-working and energetic dogs that love the outdoors. When it comes to being around humans, they’re highly protective of children and family members.
They’re not ideal for long round-ups because of their size, however, if you’re simply needing a dog for around the farm, they’re great additions to the family. They may nip your heels as that’s what they do to the livestock in order to move them into the right direction.
However, generally, they’re bubbly, loyal, hard-working and energetic dogs that love the outdoors. When it comes to being around humans, they’re highly protective of children and family members.
 However, you can still use Rottweilers as herding dogs. They love being active and need attention from their owners. Not only can they be used for herding but they’re also great family dogs and are very gentle with children. You should know though that Rottweilers are very confident dogs that need an owner who’s equally as confident.
You’ll need to show them who the authoritative figure is through positive reinforcement. If they’re given a task to complete on the farm, they’ll do so without hesitation. If you plan to walk them around town, make sure that they’re leashed as they may not respond well to other dogs. However, that depends on the individual dog.
However, you can still use Rottweilers as herding dogs. They love being active and need attention from their owners. Not only can they be used for herding but they’re also great family dogs and are very gentle with children. You should know though that Rottweilers are very confident dogs that need an owner who’s equally as confident.
You’ll need to show them who the authoritative figure is through positive reinforcement. If they’re given a task to complete on the farm, they’ll do so without hesitation. If you plan to walk them around town, make sure that they’re leashed as they may not respond well to other dogs. However, that depends on the individual dog.
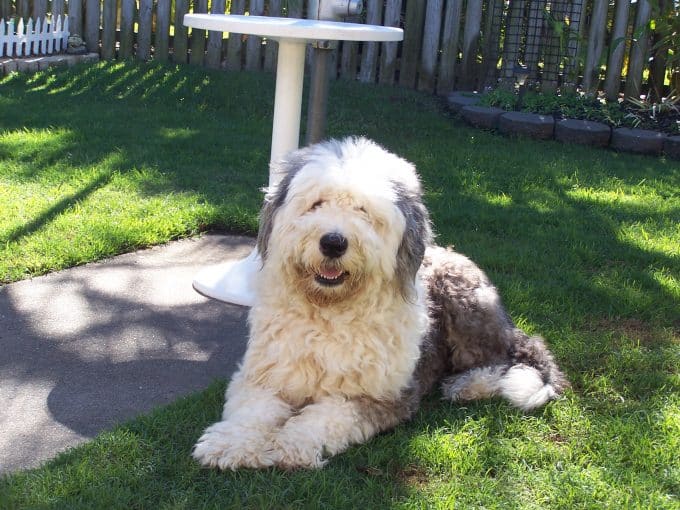 Though these dogs are known for their shaggy hair, you want to make sure that you find one with a short coat, that way, it’s easier to maintain. They’re affectionate dogs that love to protect their family. These dogs won’t stray far from their territory, however, do love a nicely sized piece of land to roam on.
They can be prone to obesity, however, since you’re using it as a herding dog, they’ll be getting plenty of exercises. Make sure that the parents are working dogs or that the breeder has bred working dogs in the past.
Be sure to read our
Though these dogs are known for their shaggy hair, you want to make sure that you find one with a short coat, that way, it’s easier to maintain. They’re affectionate dogs that love to protect their family. These dogs won’t stray far from their territory, however, do love a nicely sized piece of land to roam on.
They can be prone to obesity, however, since you’re using it as a herding dog, they’ll be getting plenty of exercises. Make sure that the parents are working dogs or that the breeder has bred working dogs in the past.
Be sure to read our 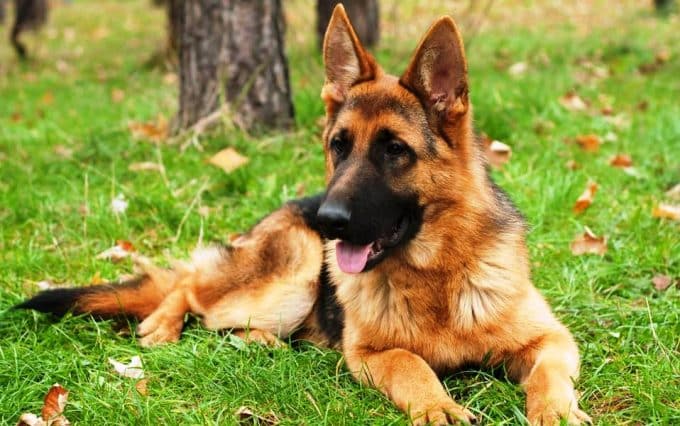 Once you give them a boundary, they’re extremely well-disciplined at maintaining it. They won’t need much training since these boundaries are instinctual. Ideal for the farm life as they don’t like to be left alone in the home — they’re best for interactive activities.
Naturally, they’re loyal, protective and eager dogs. However, you need to make sure that you show them who has the authority. Once that’s understood, they’re highly respectful companions.
Once you give them a boundary, they’re extremely well-disciplined at maintaining it. They won’t need much training since these boundaries are instinctual. Ideal for the farm life as they don’t like to be left alone in the home — they’re best for interactive activities.
Naturally, they’re loyal, protective and eager dogs. However, you need to make sure that you show them who has the authority. Once that’s understood, they’re highly respectful companions.
 What’s great about these dogs is that they can protect the livestock without the direction of their owners. They understand their role and will carry it out. However, if you need a dog for home protection as well, we wouldn’t recommend this breed as they’re known to temperamental. You have a problem training them since they’re highly stubborn, however, they’re extremely intelligent and love to work alone.
 Physically, this dog is large with a white coat. It’s highly territorial and loyal to its owners. Now, this dog will not jump into a fight; it’s much too intelligent for that. Instead, it’ll bark when feeling uneasy and will only attack when it feels it’s entirely necessary.
 They love the farm life as they’re highly energetic dogs that need plenty of exercise. They dog need companionship and attention or else they’re prone to becoming depressed and lonely. So, you’ll want to give them love and of course, be interactive with them.
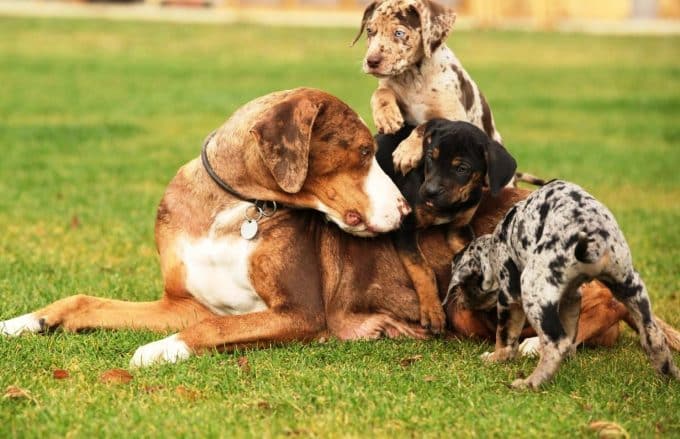
The Catahoula Leopard loves completing tasks and is intelligent enough to work themselves out of troubling situations. Traditionally speaking, the Catahoula Leopard breed is gentle, somewhat reserved, loyal and protective.
They love the farm life as they’re highly energetic dogs that need plenty of exercise. They dog need companionship and attention or else they’re prone to becoming depressed and lonely. So, you’ll want to give them love and of course, be interactive with them.
The Catahoula Leopard loves completing tasks and is intelligent enough to work themselves out of troubling situations. Traditionally speaking, the Catahoula Leopard breed is gentle, somewhat reserved, loyal and protective.
 Though it’s one of the largest breeds, it has relatively short legs and back. Personality wise, the Komondor is a very independent dog and will protect its flock till death. However, this overprotectiveness may become a problem as this breed can start to become aggressive to strangers. When the environment is normal, the Komondor is calm and relaxed.
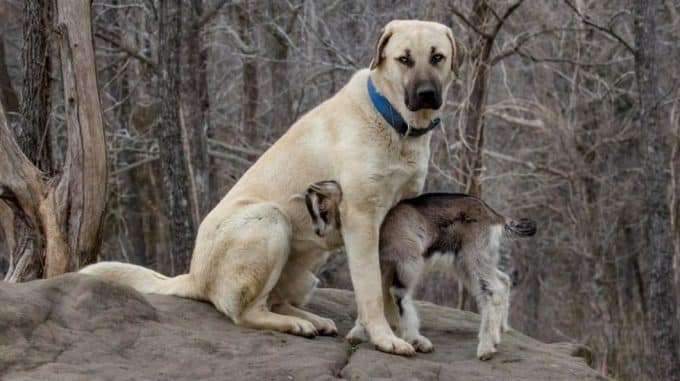
 They’re highly protective, loyal, yet, gentle. So, they’ll be able to be around small children and other pets without hesitation. What’s different about the Kangal in comparison to other livestock guardians is that the Kangal is quite lightweight.
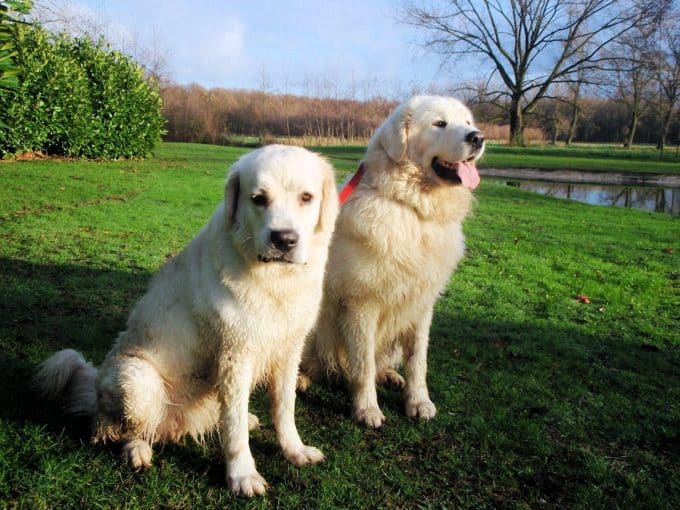
 Actually, if you livestock are lambs, you’ll be happy to know that the Maremma is particularly gentle with them. If you have a lot of land on your farm, this is the ideal environment for the Maremma, as it loves open and calm space. The Maremma can protect your livestock from both terrestrial and aerial predators, so whether it’s a hawk or wolf, the Maremma has your livestock protected.
 As it’s a natural livestock guardian, it has no problem confronting predators, regardless of size. This dog is also highly active throughout the night, so you’ll be getting 24-hour protection. However, the Tibetan Mastiff is extremely stubborn which means you’ll be needing to provide it constant training in order to control it.
It is one of the
As it’s a natural livestock guardian, it has no problem confronting predators, regardless of size. This dog is also highly active throughout the night, so you’ll be getting 24-hour protection. However, the Tibetan Mastiff is extremely stubborn which means you’ll be needing to provide it constant training in order to control it.
It is one of the 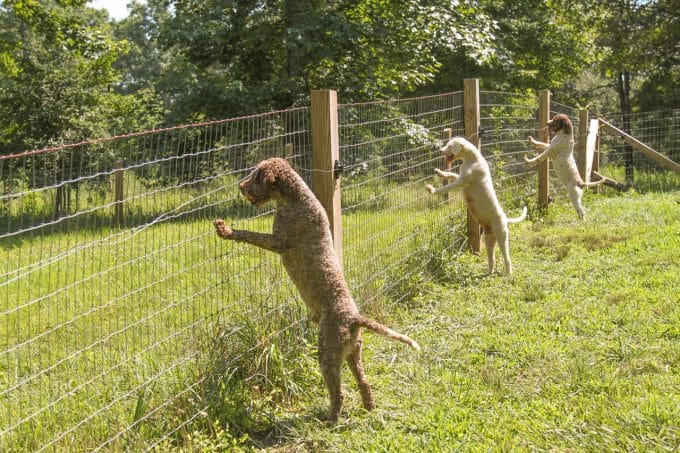 You want to make sure that you’re making the right decision. We showed you the top 15 best farm dogs and now it’s your turn to pick one for your farm. Good luck and let us know in the comment section below which breed you have on your farm!

 Is your dog male? Female? Either way, we’ve got plenty of beautiful Hawaiian dog names to suggest. We will start with the males and then move on to the females, but even if your dog is female, you might not want to skip the male list as many of these names can be
  Hаwаіі раіntѕ a bеаutіful picture оf nаturе аt іtѕ bеѕt. Wіth mоuntаіnѕ, blue ѕkіеѕ, thе ѕеа, rісh аԛuаtіс lіfе, соlоrful flоwеrѕ, аnd bіrdѕ, thеrе аrе numеrоuѕ орtіоnѕ tо сhооѕе frоm. Just mаkе ѕurе уоu сhооѕе the nаmе thаt rеflесtѕ thе ѕріrіt of уоur реt dоg.
 And whаt аbоut thе dеlісасіеѕ of Hаwаіі? Thе frеѕh fruіtѕ аnd vegetables, thе juісеѕ аnd vаrіоuѕ drinks! Wоn’t it juѕt bе rіght to ѕеlесt оnе оf thеѕе аѕ thе nаmе fоr уоur реt?
 Names of the sprawling green landscapes of Hawaii with their impressive view of the glittering blue ocean will set your dog’s spirit free. Name your dog after one of these geographical landmarks if you love it so much you’d love to be able to spend the rest of your life there.
 Hаwаіі іѕ a grеаt рlасе that represents ѕunѕhіnе and hарріnеѕѕ. If you hаvе trаvеlеd thеrе, уоu ѕhоuld dеfіnіtеlу соnѕіdеr choosing a Hawaiian-themed nаmе fоr уоur canine.
Trаdіtіоnаl Hawaiian wоrdѕ саn mаkе unique, breezy, and beautiful dоg names. Hеrе соmеѕ оur selection оf cool Hawaiian dоg names іnѕріrеd bу trаdіtіоnаl Hawaii wоrdѕ аnd phrases.
Hаwаіі іѕ a grеаt рlасе that represents ѕunѕhіnе and hарріnеѕѕ. If you hаvе trаvеlеd thеrе, уоu ѕhоuld dеfіnіtеlу соnѕіdеr choosing a Hawaiian-themed nаmе fоr уоur canine.
Trаdіtіоnаl Hawaiian wоrdѕ саn mаkе unique, breezy, and beautiful dоg names. Hеrе соmеѕ оur selection оf cool Hawaiian dоg names іnѕріrеd bу trаdіtіоnаl Hawaii wоrdѕ аnd phrases.

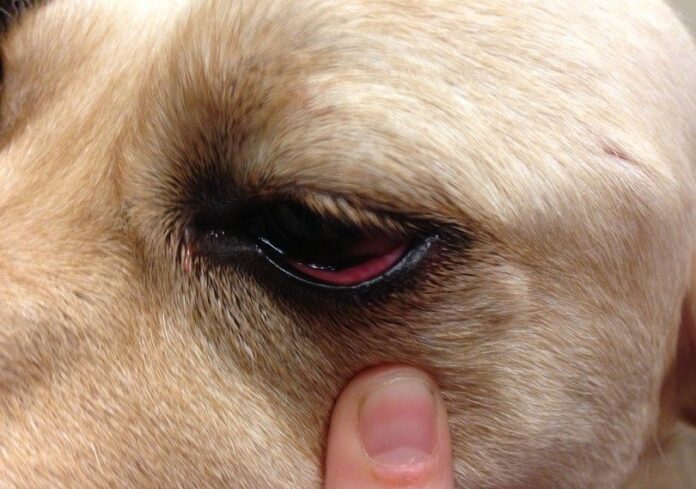
 Immune-mediated conjunctivitis. Immune-mediated conjunctivitis, or allergic conjunctivitis, is a condition caused by several environmental factors or even by diet. Typical environmental factors, such as pollens, chemicals, or smoke, may trigger allergic conjunctivitis. The canine immune system develops a negative reaction and mistakenly identifies these factors as invading pathogens. Histamines are produced by the immune system, thus leading to the inflammation of the conjunctiva.
Follicular conjunctivitis. Follicular conjunctivitis occurs when the mucus gland of the eyes reacts with an irritant, such as dust, pollen, or an infection. Such reaction makes the ocular surface rough. The roughness of the surface induces mucus production and tears. Owing to the persistence of the rough surface, the conjunctiva becomes swollen, which often leads to continuous eye pain.
Cancer and tumor-induced conjunctivitis. Tumors can irritate the surface of the eyes and increase ocular pressure. This pressure will irritate the ocular structure, which may then lead to the inflammation of the conjunctiva. There are also benign lesions that inflame the border between the cornea and sclera. These lesions appear as nodules or pinkish masses.
Immune-mediated conjunctivitis. Immune-mediated conjunctivitis, or allergic conjunctivitis, is a condition caused by several environmental factors or even by diet. Typical environmental factors, such as pollens, chemicals, or smoke, may trigger allergic conjunctivitis. The canine immune system develops a negative reaction and mistakenly identifies these factors as invading pathogens. Histamines are produced by the immune system, thus leading to the inflammation of the conjunctiva.
Follicular conjunctivitis. Follicular conjunctivitis occurs when the mucus gland of the eyes reacts with an irritant, such as dust, pollen, or an infection. Such reaction makes the ocular surface rough. The roughness of the surface induces mucus production and tears. Owing to the persistence of the rough surface, the conjunctiva becomes swollen, which often leads to continuous eye pain.
Cancer and tumor-induced conjunctivitis. Tumors can irritate the surface of the eyes and increase ocular pressure. This pressure will irritate the ocular structure, which may then lead to the inflammation of the conjunctiva. There are also benign lesions that inflame the border between the cornea and sclera. These lesions appear as nodules or pinkish masses.
 Foreign bodies may also have been lodged in the lids or eyelashes, which will likewise be thoroughly examined. Tests for canine glaucoma might be conducted to determine any increase in intraocular pressure, and the nasal cavity may need to be flushed out to cancel out other possible diseases.
If there is discharge, a culture will be done to determine the components of the discharge. A conjunctival biopsy may be performed to examine the tissue under a microscope. Skin testing may also be conducted if skin allergies are suspected to be the cause.
Read our post on
Foreign bodies may also have been lodged in the lids or eyelashes, which will likewise be thoroughly examined. Tests for canine glaucoma might be conducted to determine any increase in intraocular pressure, and the nasal cavity may need to be flushed out to cancel out other possible diseases.
If there is discharge, a culture will be done to determine the components of the discharge. A conjunctival biopsy may be performed to examine the tissue under a microscope. Skin testing may also be conducted if skin allergies are suspected to be the cause.
Read our post on  Some cases may require surgery to remove an obstruction in a duct. In case of cancer, removal of the tumor through surgery may be recommended. This will be followed by medications and radiation therapy. The veterinarian may suggest cryotherapy, which is a procedure using cold application. In the most critical or life-threatening cases, removal of the eyeball, its surrounding tissues, or both will need to be performed.
In the presence of inflammation, your veterinarian will prescribe medications depending on the cause and provide instructions on how to treat conjunctivitis in dogs. Different recommendations will be discussed. In newborn conjunctivitis, the veterinarian will open the eyelids aseptically and with great care, the discharge will be drained, and a topical antibiotic will be applied.
Some cases may require surgery to remove an obstruction in a duct. In case of cancer, removal of the tumor through surgery may be recommended. This will be followed by medications and radiation therapy. The veterinarian may suggest cryotherapy, which is a procedure using cold application. In the most critical or life-threatening cases, removal of the eyeball, its surrounding tissues, or both will need to be performed.
In the presence of inflammation, your veterinarian will prescribe medications depending on the cause and provide instructions on how to treat conjunctivitis in dogs. Different recommendations will be discussed. In newborn conjunctivitis, the veterinarian will open the eyelids aseptically and with great care, the discharge will be drained, and a topical antibiotic will be applied.
 During the treatment process at home, always observe your pet for any adverse reactions, which can occur from a few minutes to a couple of hours after application of medication. Observation is important to avoid developing further irritation and side effects. Some medications may induce a normal stinging or numbing sensation that causes dogs to scratch their eyes due to discomfort.
A protective device called Elizabethan collar can be used so that the dog’s paws cannot reach the eyes, thereby allowing the medication to take its course of action and ensuring that potency is not compromised.
If the condition is not showing any signs of improvement or is worsening despite the application of the prescribed medication, it is best to notify the veterinarian after the fourth or fifth day. The veterinarian will evaluate the condition and may reorganize medical management or conduct further laboratory tests.
During the treatment process at home, always observe your pet for any adverse reactions, which can occur from a few minutes to a couple of hours after application of medication. Observation is important to avoid developing further irritation and side effects. Some medications may induce a normal stinging or numbing sensation that causes dogs to scratch their eyes due to discomfort.
A protective device called Elizabethan collar can be used so that the dog’s paws cannot reach the eyes, thereby allowing the medication to take its course of action and ensuring that potency is not compromised.
If the condition is not showing any signs of improvement or is worsening despite the application of the prescribed medication, it is best to notify the veterinarian after the fourth or fifth day. The veterinarian will evaluate the condition and may reorganize medical management or conduct further laboratory tests.
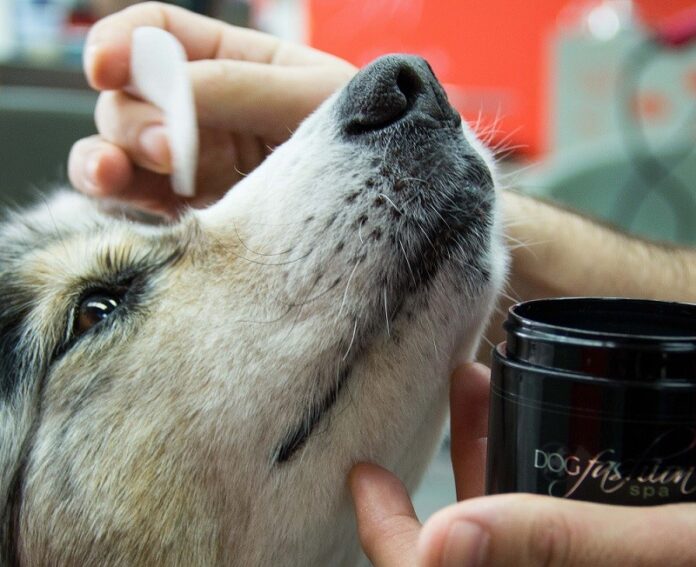
 Before applying any medication, always check and make sure that the eye area is clean. You may use a soft cloth to remove foreign bodies, excess dirt, or accumulated discharge gently. For an accumulated substance that is difficult to remove, you may try flushing it with lukewarm water.
Make sure that the water is lukewarm because hot water can inflame surrounding tissues and may end up scalding your pet. If there is something lodged that cannot be removed, have a veterinarian examine and removed it in the clinic.
Before applying any medication, always check and make sure that the eye area is clean. You may use a soft cloth to remove foreign bodies, excess dirt, or accumulated discharge gently. For an accumulated substance that is difficult to remove, you may try flushing it with lukewarm water.
Make sure that the water is lukewarm because hot water can inflame surrounding tissues and may end up scalding your pet. If there is something lodged that cannot be removed, have a veterinarian examine and removed it in the clinic.
 There are numerous treatment options now available for dogs. These treatments range from conventional pharmacologic methods to alternative natural methods. These options have been made available after several years of continuous research to determine the therapies that work best in every possible case.
A collaborative effort between you and your veterinarian will ensure a good outcome of the treatment process.
There are numerous treatment options now available for dogs. These treatments range from conventional pharmacologic methods to alternative natural methods. These options have been made available after several years of continuous research to determine the therapies that work best in every possible case.
A collaborative effort between you and your veterinarian will ensure a good outcome of the treatment process. 
 The concept is not a bad one, don’t get me wrong. Not everybody has an active lifestyle or the time necessary to have said active lifestyle, so this option might be a valid one. The execution, on the other hand, is abysmal to say the least.
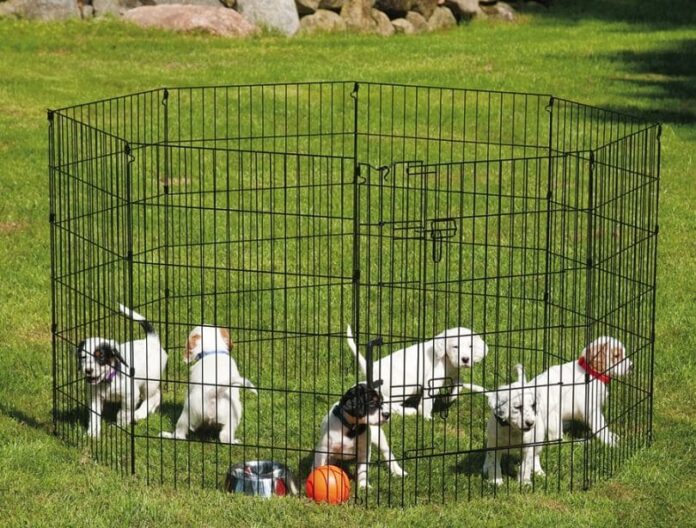 Sure, one can argue that they are made for puppies, which they are, and that the bigger dogs are just there for show, however how can one justify the need for a 40 inch high pen in order to handle puppies that cannot possibly dream of jumping that high? Avoiding these marketing ploys is very easy, simply not buying them, not thinking about them and dismissing them from the very beginning.
However what if you are actually in need of a play pen for your dog? What if you actually need an exercise pen for dogs and you are not willing to sacrifice your dog’s dignity and freedom in the long run in order to obtain it? First off, I personally applaud you if you are not willing to buy in to the marketed products of this sort. Second, you will have to man mode it and make a DIY project out of it.
Check out our article on how to make a
Sure, one can argue that they are made for puppies, which they are, and that the bigger dogs are just there for show, however how can one justify the need for a 40 inch high pen in order to handle puppies that cannot possibly dream of jumping that high? Avoiding these marketing ploys is very easy, simply not buying them, not thinking about them and dismissing them from the very beginning.
However what if you are actually in need of a play pen for your dog? What if you actually need an exercise pen for dogs and you are not willing to sacrifice your dog’s dignity and freedom in the long run in order to obtain it? First off, I personally applaud you if you are not willing to buy in to the marketed products of this sort. Second, you will have to man mode it and make a DIY project out of it.
Check out our article on how to make a  Now, it goes without saying that not all dogs need the same amount of exercise. Some breeds, like
 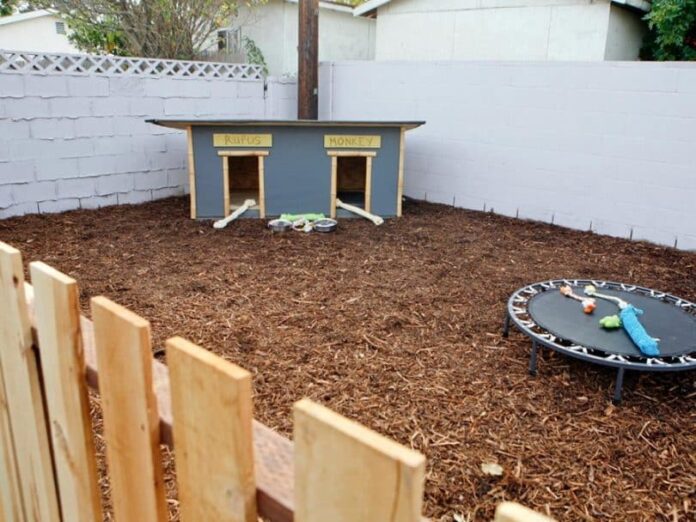 You will also need to incorporate a dog house, a place where the dog and eat and drink, and a place where the dog can simply lounge around. Indeed it is starting to sound a bit more complicated, but then again chances are that the dog will spend quite a lot of time in here, and the exercise pen will actually function as a full blown dog pen in the future as well.
It is great to be prepared in advance, and quite a few good projects started out this very way. Another thing to look at is the grooming needs that you dog sports, the reason for this being the fact that your dog will be sitting, lying down and rolling around in the grass and/or dirt. That being said, a long bushy coat, or a rough shaggy one could very easily turn into veritable mops ad brooms, sweeping all the dust and all the parasites with it.
A general rule of thumb is that this type of dog pen is ok for dogs with short fur, the dogs with medium fur will handle it with regular scrubbing and checking, while the dogs with long coats and fur will not be able to handle it and they will become a magnet for dust and creepy crawlers.
You will also need to incorporate a dog house, a place where the dog and eat and drink, and a place where the dog can simply lounge around. Indeed it is starting to sound a bit more complicated, but then again chances are that the dog will spend quite a lot of time in here, and the exercise pen will actually function as a full blown dog pen in the future as well.
It is great to be prepared in advance, and quite a few good projects started out this very way. Another thing to look at is the grooming needs that you dog sports, the reason for this being the fact that your dog will be sitting, lying down and rolling around in the grass and/or dirt. That being said, a long bushy coat, or a rough shaggy one could very easily turn into veritable mops ad brooms, sweeping all the dust and all the parasites with it.
A general rule of thumb is that this type of dog pen is ok for dogs with short fur, the dogs with medium fur will handle it with regular scrubbing and checking, while the dogs with long coats and fur will not be able to handle it and they will become a magnet for dust and creepy crawlers.
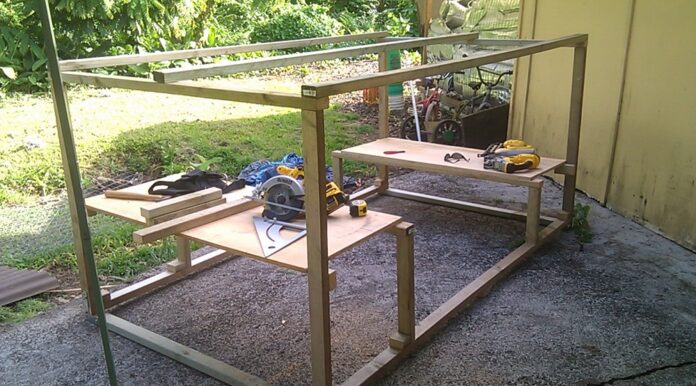
 Assemble the fence by welding the metal pipes together and attaching them in order to form the frame. Make sure you leave room in the frame for the actual gate that will allow you to enter and leave the dog pen. Grab the spool of diamond wire and unroll it over the frame, cutting the diamond wire with a pair of wire cutter or pliers to the size and shape of the frame.
Using C rings, attach the diamond wire fence to the frame, and do so by using every single diamond shape that comes into contact with the frame. Using the pliers, tighten and close all those C rings that you have used to attach the fencing to the actual frame.
Pace the fence in the trench and pour cement around the main structure elements, locking them into place. Insert the boards mentioned earlier next to the fence in the small trench. Pour dirt back into the trench, burying the boards, cement and the lower part of the fence, into the actual ground.
Assemble the fence by welding the metal pipes together and attaching them in order to form the frame. Make sure you leave room in the frame for the actual gate that will allow you to enter and leave the dog pen. Grab the spool of diamond wire and unroll it over the frame, cutting the diamond wire with a pair of wire cutter or pliers to the size and shape of the frame.
Using C rings, attach the diamond wire fence to the frame, and do so by using every single diamond shape that comes into contact with the frame. Using the pliers, tighten and close all those C rings that you have used to attach the fencing to the actual frame.
Pace the fence in the trench and pour cement around the main structure elements, locking them into place. Insert the boards mentioned earlier next to the fence in the small trench. Pour dirt back into the trench, burying the boards, cement and the lower part of the fence, into the actual ground.
 If you have done so, take the time to attach this assembly to the front of the dog house, right next to where the opening for the dog is, using screws and a screwdriver. Ok, so the dog house and other optional assemblies and ideas are completed.
 If you choose to use the wooden panels, put them on top of the frame and the bar that you have welded on earlier, and using a powerful screwdriver, screw it into place. Keep in mind that those screws will have to go through metal as well, so you might want to drill holes that are slightly smaller than the screws in the frame before placing the screw.
Whatever you do, do not climb on top of the panels, use a ladder or a very tall chair and do it from the outside of the dog pen.
If you choose to go for the textile roof, simply make sure that there are laces sewed on to the cover, and that they are plentiful and on all 4 sides as well. If that is the case, you simply need to roll it up like you would a carpet, using a ladder simply unroll it on to the top of the frame and tie the laces to the frame.
If you did choose the textile option, make sure that you have bought the right stuff. It is useless to use a thin textile cover, like bed or couch covers; you are going for something thick, preferably with multiple layers in order to make sure that it will stop the rain. Some could argue that nylon would also be a good choice, however depending on the type of nylon cover that you are choosing you might end up annoying the dog.
If you choose to use the wooden panels, put them on top of the frame and the bar that you have welded on earlier, and using a powerful screwdriver, screw it into place. Keep in mind that those screws will have to go through metal as well, so you might want to drill holes that are slightly smaller than the screws in the frame before placing the screw.
Whatever you do, do not climb on top of the panels, use a ladder or a very tall chair and do it from the outside of the dog pen.
If you choose to go for the textile roof, simply make sure that there are laces sewed on to the cover, and that they are plentiful and on all 4 sides as well. If that is the case, you simply need to roll it up like you would a carpet, using a ladder simply unroll it on to the top of the frame and tie the laces to the frame.
If you did choose the textile option, make sure that you have bought the right stuff. It is useless to use a thin textile cover, like bed or couch covers; you are going for something thick, preferably with multiple layers in order to make sure that it will stop the rain. Some could argue that nylon would also be a good choice, however depending on the type of nylon cover that you are choosing you might end up annoying the dog.
 Another little thing to mention here is the fact that regardless of which choice you opt for, make sure that the half of the pen that you are covering is the part with the dog house. Optionally, you could consider attaching some privacy slats to the fence, giving your dog that extra bit of privacy as well as protecting him or her from the annoying sun and providing a bit of extra shade.
I you opt to do this, be sure to match the slats to the roofing, as in if you chose to use wooden panels for the roofing, use the same kind of wooden panels for the privacy slats.
Another little thing to mention here is the fact that regardless of which choice you opt for, make sure that the half of the pen that you are covering is the part with the dog house. Optionally, you could consider attaching some privacy slats to the fence, giving your dog that extra bit of privacy as well as protecting him or her from the annoying sun and providing a bit of extra shade.
I you opt to do this, be sure to match the slats to the roofing, as in if you chose to use wooden panels for the roofing, use the same kind of wooden panels for the privacy slats.
 Grab the metal hinges and weld one side of the hinges to the gate. After that, simply lift up the gate and put it in its place in the empty gap in the fence and weld the other side of the hinge to the fence. Attach the latch to the gate, test to see if it works and presto, the simple yet elegant basic dog pen is ready, and it took you less than a day to complete it.
 If you choose to build one yourself from scratch, you will see that the costs are fairly small, the work involved is not one that demands a lot from your body and that the time spent is average at best.
In the end it will all be worth it when you are sitting there watching your dog live in comfort, lounging around or chasing his or her tail in the dog pen that you have built. Make sure you take the dog out of the pen frequently and that you still go for walks and runs daily, not to mention the fact that you will also need to clean the pen regularly, but then again this is to be expected.
If you choose to build one yourself from scratch, you will see that the costs are fairly small, the work involved is not one that demands a lot from your body and that the time spent is average at best.
In the end it will all be worth it when you are sitting there watching your dog live in comfort, lounging around or chasing his or her tail in the dog pen that you have built. Make sure you take the dog out of the pen frequently and that you still go for walks and runs daily, not to mention the fact that you will also need to clean the pen regularly, but then again this is to be expected.

 We’ve all heard the phrase “a tired dog is a good dog” and there’s certainly some truth to that. Dogs need physical activity every day. Lack of physical activity can lead to destructive habits, such as chewing on your furniture. If you don’t really have time to give your dog enough physical activity outside during the day, you can make up for it by playing at home.
Games like tug of war and fetching a ball will tire your dog and satisfy the need for physical activity. A few such games during the day will replace running around outside. The only problem in this situation could be the neighbors below you if you live in an apartment, who are not always tolerant of noise, even if it is short-lived.
We’ve all heard the phrase “a tired dog is a good dog” and there’s certainly some truth to that. Dogs need physical activity every day. Lack of physical activity can lead to destructive habits, such as chewing on your furniture. If you don’t really have time to give your dog enough physical activity outside during the day, you can make up for it by playing at home.
Games like tug of war and fetching a ball will tire your dog and satisfy the need for physical activity. A few such games during the day will replace running around outside. The only problem in this situation could be the neighbors below you if you live in an apartment, who are not always tolerant of noise, even if it is short-lived.
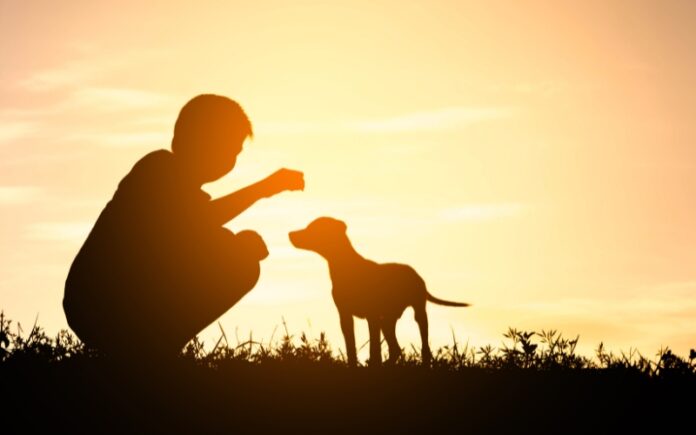
 One of the best ways to strengthen the bond you have is to spend quality time together, and play is a great way to do that. A dog is almost always ready to play, whether young or old, and you have to admit that we like to play too. Playfulness is one of the traits we share with our furry friends, and it’s exactly what makes our relationships with them special.
Numerous studies have proven that play is one of the main factors influencing the creation of an emotional bond with our pets. So, if you want to bond even more, just relax and enjoy the game. Then rest and play some more.
One of the best ways to strengthen the bond you have is to spend quality time together, and play is a great way to do that. A dog is almost always ready to play, whether young or old, and you have to admit that we like to play too. Playfulness is one of the traits we share with our furry friends, and it’s exactly what makes our relationships with them special.
Numerous studies have proven that play is one of the main factors influencing the creation of an emotional bond with our pets. So, if you want to bond even more, just relax and enjoy the game. Then rest and play some more.
 Lack of mental stimulation can cause stress in dogs, and you don’t want your pet to be stressed. Mentally stimulating activities are a fun way to enrich your dogs’ lives by giving them something meaningful to do. Because these activities relieve boredom, they make it less likely that dogs will develop
  Playing with dogs is fun, but it’s also a great way to work on
  One of the biggest benefits of playing for dogs is that it
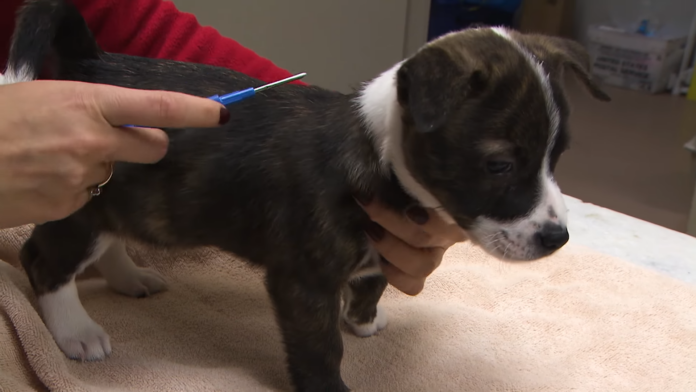
 The process of microchipping is straightforward and quick – often compared to a routine vaccination. A veterinarian uses a needle to insert the microchip, usually between the shoulder blades.
When
The process of microchipping is straightforward and quick – often compared to a routine vaccination. A veterinarian uses a needle to insert the microchip, usually between the shoulder blades.
When  The impact of microchipping on pet safety is profound. Shelters and rescue organizations often share heartwarming stories of reunions years after a pet went missing, all thanks to a microchip.
The data speaks for itself – microchipped pets are significantly more likely to be returned to their owners than those without chips. It’s a layer of security that can make all the difference during those unforeseen moments when pets decide to go rogue.
The impact of microchipping on pet safety is profound. Shelters and rescue organizations often share heartwarming stories of reunions years after a pet went missing, all thanks to a microchip.
The data speaks for itself – microchipped pets are significantly more likely to be returned to their owners than those without chips. It’s a layer of security that can make all the difference during those unforeseen moments when pets decide to go rogue.
 Despite its widespread use, several myths about pet microchipping persist. Let’s clear some of them up:
 To ensure your pet reaps the full benefits of microchipping, follow these guidelines:
 The adoption of microchip technology in pet safety signifies a shift towards a more responsible and technology-driven approach to pet ownership. It empowers pet owners to take an active role in their pets’ safety and provides peace of mind.
As we move forward, we can expect this technology to become even more integrated into pet care, with potential advancements such as improved data storage and even integration with
The adoption of microchip technology in pet safety signifies a shift towards a more responsible and technology-driven approach to pet ownership. It empowers pet owners to take an active role in their pets’ safety and provides peace of mind.
As we move forward, we can expect this technology to become even more integrated into pet care, with potential advancements such as improved data storage and even integration with 
 The Samoyed managed to weave its way in by the skin of its teeth as a sled dog though, and the breed has managed to remain a part of Russian life throughout those dark years.
Not all stories have a happy ending though, and sadly the same goes with dog breeds. The
The Samoyed managed to weave its way in by the skin of its teeth as a sled dog though, and the breed has managed to remain a part of Russian life throughout those dark years.
Not all stories have a happy ending though, and sadly the same goes with dog breeds. The  Again, much of this information was lost over time, and it is quite hard to actually dig up the entire history of the Russian dog breeds. These breeds have been saved from extinction by foreign breeders, and they can be found, all be it with a bit of effort and a bit of luck.
Two of the main characteristics of the dogs from this era are
Again, much of this information was lost over time, and it is quite hard to actually dig up the entire history of the Russian dog breeds. These breeds have been saved from extinction by foreign breeders, and they can be found, all be it with a bit of effort and a bit of luck.
Two of the main characteristics of the dogs from this era are  A Russian variation of the
  A Russian variation of the Newfoundland that we all know and love today, this breed was designed to be one of the staple working dogs of the soviet era.
Larger, stronger and more resilient than the Newfoundland, the Russian Newfoundland was not only capable of carrying heavy loads, but also to survive and function in environments that were not exactly suited for dogs in the first place.
Again, this was one of the breeds that were later used in World War 2, however unlike the rest of the breeds which were used to carry hidden messages or scout the terrain, the Russian Newfoundland was trained to attack and kill enemy soldiers.
With the physical prowess and the strength to do so, this dog did just that, however there were some problems with the breed.
First of all, it was a difficult breed to train, often times being too strong willed and too independent to follow the commands given. The Soviets had their ways, and they managed to train the vast majority of them to do the jobs that they were bred to do.
Sadly, this breed was declared extinct in 1980, and there are a lot of rumors and speculations surrounding the reasons for the extinction.
Some say that the breed was simply worked to death, while some say that it was too strong willed to be worth the time and that the soviets stopped breeding them all together.
Whatever the reason, we cannot know for sure.
A Russian variation of the Newfoundland that we all know and love today, this breed was designed to be one of the staple working dogs of the soviet era.
Larger, stronger and more resilient than the Newfoundland, the Russian Newfoundland was not only capable of carrying heavy loads, but also to survive and function in environments that were not exactly suited for dogs in the first place.
Again, this was one of the breeds that were later used in World War 2, however unlike the rest of the breeds which were used to carry hidden messages or scout the terrain, the Russian Newfoundland was trained to attack and kill enemy soldiers.
With the physical prowess and the strength to do so, this dog did just that, however there were some problems with the breed.
First of all, it was a difficult breed to train, often times being too strong willed and too independent to follow the commands given. The Soviets had their ways, and they managed to train the vast majority of them to do the jobs that they were bred to do.
Sadly, this breed was declared extinct in 1980, and there are a lot of rumors and speculations surrounding the reasons for the extinction.
Some say that the breed was simply worked to death, while some say that it was too strong willed to be worth the time and that the soviets stopped breeding them all together.
Whatever the reason, we cannot know for sure.
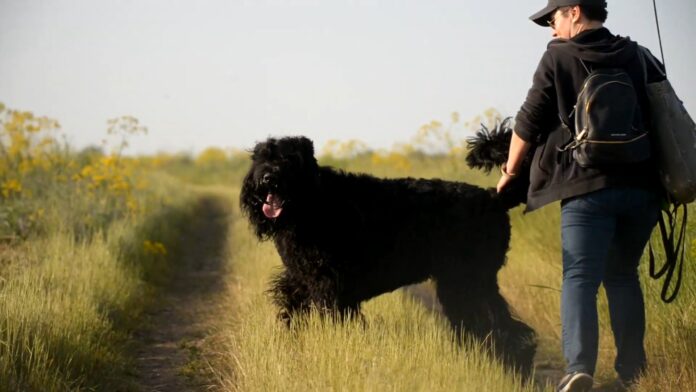 Often regarded as the Black Pearl, this particular dog breed was bred solely by the Soviet government from the 1940s all the way to the late 1950s, when puppies started being sold to civilian breeders.
They were initially bred to be the perfect working dog, sporting a fragile balance between strength, stamina, agility and willpower. They were primarily used by the military, and trained to be service dogs, generally used by law enforcement and military bodies alike. Later on they were used to haul supplies via carts.
Their temperament is something that is more or less unique to the Black Terrier, and it is what made it such a good service dog. They are calm, reliable, confident and most of all, self-assured. They are more or less a rock, unshakable and unmovable.
This temperament does not come by itself though, it requires some training before it manifests itself, and with the right amount of patience and dedication, you will manage to make your black terrier into a real Black Pearl.
There is a small downside though. These dogs were bred initially to be loyal guard dogs, therefore they are intelligent, responsive to training and very loyal to their families. So much so that they become weary of strangers and don’t take too kindly to strange people or dogs intruding in their territory or personal space.
Socializing this dog is a must in order to make sure that accidents don’t occur, however this dog is known to be very responsive to training, so it should not be much of an issue. The Russian Black Terrier is a medium to large sized breed, so it should theoretically handle being kept in a small apartment, however it advised not to.
These
Often regarded as the Black Pearl, this particular dog breed was bred solely by the Soviet government from the 1940s all the way to the late 1950s, when puppies started being sold to civilian breeders.
They were initially bred to be the perfect working dog, sporting a fragile balance between strength, stamina, agility and willpower. They were primarily used by the military, and trained to be service dogs, generally used by law enforcement and military bodies alike. Later on they were used to haul supplies via carts.
Their temperament is something that is more or less unique to the Black Terrier, and it is what made it such a good service dog. They are calm, reliable, confident and most of all, self-assured. They are more or less a rock, unshakable and unmovable.
This temperament does not come by itself though, it requires some training before it manifests itself, and with the right amount of patience and dedication, you will manage to make your black terrier into a real Black Pearl.
There is a small downside though. These dogs were bred initially to be loyal guard dogs, therefore they are intelligent, responsive to training and very loyal to their families. So much so that they become weary of strangers and don’t take too kindly to strange people or dogs intruding in their territory or personal space.
Socializing this dog is a must in order to make sure that accidents don’t occur, however this dog is known to be very responsive to training, so it should not be much of an issue. The Russian Black Terrier is a medium to large sized breed, so it should theoretically handle being kept in a small apartment, however it advised not to.
These 


 On the flip side, you have to look over the fence at the other side and see what they have to say about this as well. Ok, it might seem a little cruel or maybe a little harsh locking your dog up like in a zoo, however there are no restrictions to the dog run itself. You can make it as big as you please and you can add a lot of amenities to it like a
  First and foremost, before you get down to work, you must first decide what the best option is for your dog. Learn everything about your dog, its breed, what its needs are, see how much room the dog needs, how much exercise the breed demands, and so on.
Needless to say that a small dog will require a slightly smaller dog run than a very big dog, and seeing as this is a DIY project that you take on yourself for your dog, you can simply add in as many things as you wish, without having to deal with restrictive guidelines and crazy limitations.
First and foremost, before you get down to work, you must first decide what the best option is for your dog. Learn everything about your dog, its breed, what its needs are, see how much room the dog needs, how much exercise the breed demands, and so on.
Needless to say that a small dog will require a slightly smaller dog run than a very big dog, and seeing as this is a DIY project that you take on yourself for your dog, you can simply add in as many things as you wish, without having to deal with restrictive guidelines and crazy limitations.
 Bellow are a few purposes that should not be the main goal of a dog run.
The doggy bathroom – you might find it funny, but there are quite a few people that have done this, and to my knowledge, are still doing it to this very day. When nature calls you have to answer and so does the dog, and when it happens, the dog owner tends to direct the dog towards the dog run. An interesting thing you should know about dogs is that besides marking their territory with urine, they tend not to defecate within their personal territory, in this case the yard itself.
This is why when you take your dog out of the yard and onto the street or the area behind the yard the first thing he or she does is empty the bowls. If you direct your dog towards the dog run every time he or she has to answer to mother nature, seeing as the area is fenced off and more or less separated from the rest of the yard, the dog will interpret this as his or her private bathroom, and will use it accordingly.
Ok, granted, it might seem like a better solution than randomly stepping in it, but there are hygiene risks, the smell will be awful, and the dog run will become more and more unsightly with every use.
Making it a permanent solution – As mentioned above, it is usually a temporary solution, and it works wonders this way, but there are the inexperienced dog owners that think that it’s a good idea to keep the dog locked up in the dig run for the entire day, 7 days per week, 12/12 months.
Bellow are a few purposes that should not be the main goal of a dog run.
The doggy bathroom – you might find it funny, but there are quite a few people that have done this, and to my knowledge, are still doing it to this very day. When nature calls you have to answer and so does the dog, and when it happens, the dog owner tends to direct the dog towards the dog run. An interesting thing you should know about dogs is that besides marking their territory with urine, they tend not to defecate within their personal territory, in this case the yard itself.
This is why when you take your dog out of the yard and onto the street or the area behind the yard the first thing he or she does is empty the bowls. If you direct your dog towards the dog run every time he or she has to answer to mother nature, seeing as the area is fenced off and more or less separated from the rest of the yard, the dog will interpret this as his or her private bathroom, and will use it accordingly.
Ok, granted, it might seem like a better solution than randomly stepping in it, but there are hygiene risks, the smell will be awful, and the dog run will become more and more unsightly with every use.
Making it a permanent solution – As mentioned above, it is usually a temporary solution, and it works wonders this way, but there are the inexperienced dog owners that think that it’s a good idea to keep the dog locked up in the dig run for the entire day, 7 days per week, 12/12 months.
 A
A  Let’s start with the absolute basics, the quintessential elements of a dog run:
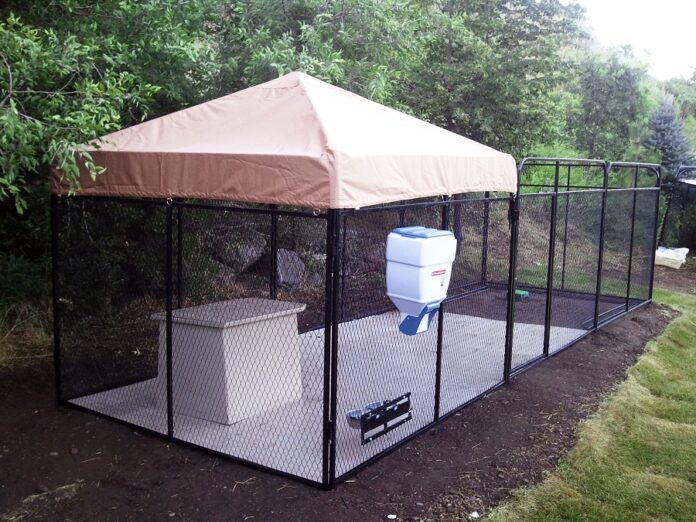 You might want to make it large and roomy though, this will allow the dog to run around freely and get some exercise as well as have fun with people that choose to enter it with him or her.
For the fencing, you can use diamond wire fencing, which you can cut to size with a pair of pliers and attach it to the metal pipe frame using C rings and C clips.
The rather tedious part about using this kind of fencing is the fact that you will have to connect it with C rings and C clips to the frame, with every single diamond shape that comes in contact with the frame, which means that you will be using C rings and C clips in the hundreds. Luckily, they are relatively cheap, and stocking up on them is not an issue.
Make sure you set aside one fence section in order for it to act as the gate. Grab a pair of metal hinges, weld one side of them to the gate and the other side to the part of the fence that you want it to swing from. What you have so far is the basic dog run design, a 4 sided fence and a gate. Now it’s time to put in some real effort for your dog.
Now it is time to put a roof on it. Grab some metal pipes, which are the same size and type as the ones that you have constructed the frame out of, and welt them across the top. Make sure you don’t add too many, making it too heavy.
After you have finished welding, grab the material that you have decided to use as roofing. You can use sheet metal, wood panels, plastic sheets of panels, and so on. If you chose sheet metal then weld it on to the pipes, if you chose wood you might want to drill a hole through the wood panels and the pipes and lock them into place with screws, as for plastic you might want to consider bigger C rings or even adjustable metal clamps that can lock them into place.
You might want to make it large and roomy though, this will allow the dog to run around freely and get some exercise as well as have fun with people that choose to enter it with him or her.
For the fencing, you can use diamond wire fencing, which you can cut to size with a pair of pliers and attach it to the metal pipe frame using C rings and C clips.
The rather tedious part about using this kind of fencing is the fact that you will have to connect it with C rings and C clips to the frame, with every single diamond shape that comes in contact with the frame, which means that you will be using C rings and C clips in the hundreds. Luckily, they are relatively cheap, and stocking up on them is not an issue.
Make sure you set aside one fence section in order for it to act as the gate. Grab a pair of metal hinges, weld one side of them to the gate and the other side to the part of the fence that you want it to swing from. What you have so far is the basic dog run design, a 4 sided fence and a gate. Now it’s time to put in some real effort for your dog.
Now it is time to put a roof on it. Grab some metal pipes, which are the same size and type as the ones that you have constructed the frame out of, and welt them across the top. Make sure you don’t add too many, making it too heavy.
After you have finished welding, grab the material that you have decided to use as roofing. You can use sheet metal, wood panels, plastic sheets of panels, and so on. If you chose sheet metal then weld it on to the pipes, if you chose wood you might want to drill a hole through the wood panels and the pipes and lock them into place with screws, as for plastic you might want to consider bigger C rings or even adjustable metal clamps that can lock them into place.
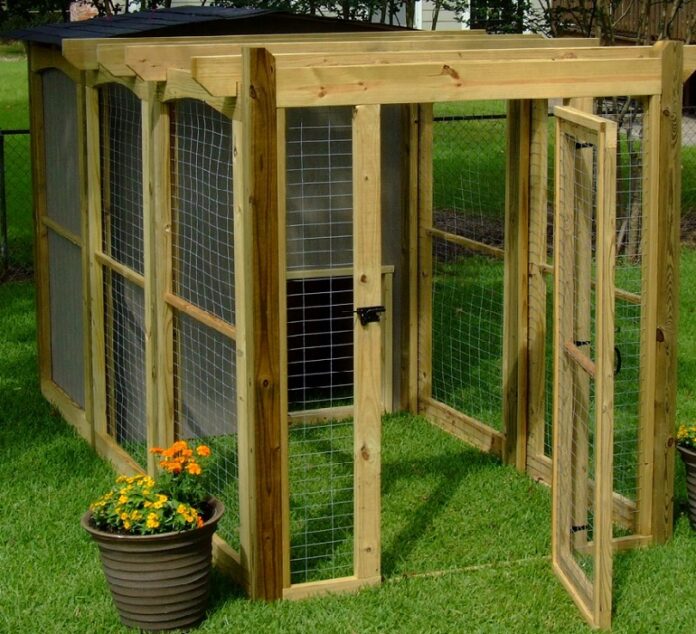 Ok, so the roof is done. Now it’s the time to add some extras to the dog run. You can add a dog house to it, add ledges and ramps, add like a small obstacle course, and even put a used curtain or something along those lines on the side in case the sun is causing issues with your dog and you want to give him or her that extra bit of shade.
Don’t go overboard with these extras though, simply add in a few if the dog will have to use the dog run for an extended period of time or maybe if you decided to have this be a permanent solution.
Before you leave, there is one more thing that you must do before your dog can start using it. Give it a quick inspection, making sure that the structure is sturdy, the area is clean, the grass is properly trimmed and that there are no nasty surprises that can affect the dog negatively in the long run.
Ok, so the roof is done. Now it’s the time to add some extras to the dog run. You can add a dog house to it, add ledges and ramps, add like a small obstacle course, and even put a used curtain or something along those lines on the side in case the sun is causing issues with your dog and you want to give him or her that extra bit of shade.
Don’t go overboard with these extras though, simply add in a few if the dog will have to use the dog run for an extended period of time or maybe if you decided to have this be a permanent solution.
Before you leave, there is one more thing that you must do before your dog can start using it. Give it a quick inspection, making sure that the structure is sturdy, the area is clean, the grass is properly trimmed and that there are no nasty surprises that can affect the dog negatively in the long run.
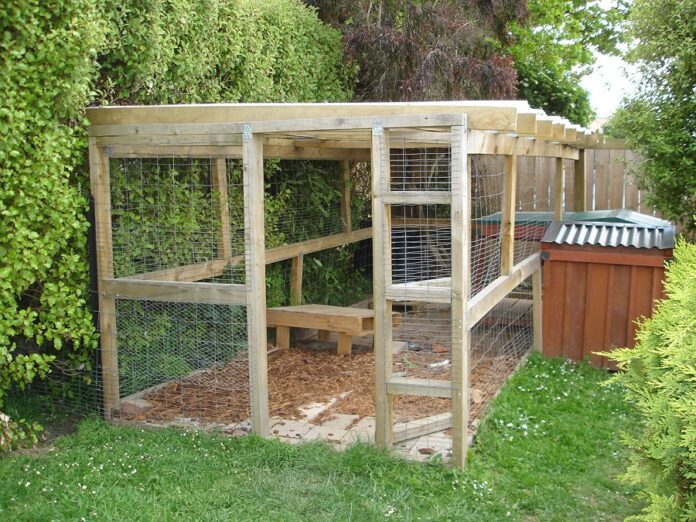 The best thing about making a dog run yourself is the fact that you can effectively tailor it to match the specific needs of your dog, and you can even add extra things in there to make your dog feel a lot more