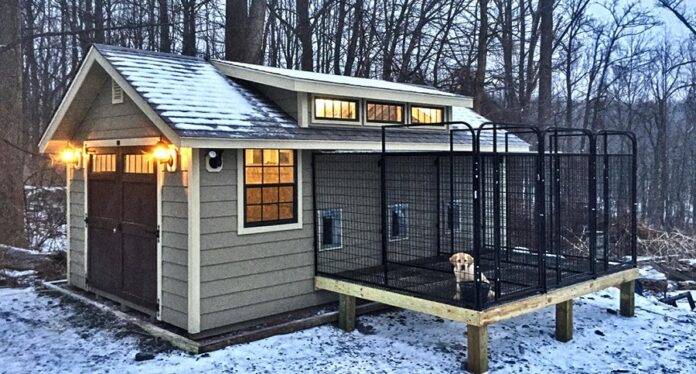
Being able to provide shelter for your dog is a necessity if you want to keep him happy and healthy. He may have fun romping around outside and taking in all of the wonderful smells. Not to mention that you get to keep the inside of your home free of fur.
Whether your dog simply does better outdoors or your home is too small for them, it’s important that you provide some kind of shelter that he can use. This is even more essential during the cold winter months, when he is at risk for hypothermia and frostbite.
Even cold weather dog breeds that do well in winter need some kind of shelter from the ice and snow so that their health is not being jeopardized. In this article, there are tips and how-to on winterizing your dog house, as well as building one from scratch.
Hypothermia and frostbite
Winter can be a cruel time for those who are exposed to the elements, and the same is true of your dog. Hypothermia sets in when your dog’s internal temperature is abnormally low. This can result in damage to your dog’s central nervous system.
The heart and rate of blood flow are also affected, as they begin to slow in an attempt to preserve themselves. Signs of hypothermia include an irregular heartbeat, impaired consciousness, and irregular breathing. If you see that your dog is acting lethargic or being slower than normal, then you should seek medical attention immediately.

Frostbite is a more difficult condition to diagnose, due to your dog’s fur. Your dogs extremities should be checked on a regular basis, such as their ears, tail and paws. If they feel extremely cold, then they are suffering from frostbite.
This is when the body retracts the blood flowing into the extremities in order to keep the core temperature regular. This means that ice crystals can form in your dog’s blood and lead to damage in his veins and arteries.
Where to put your dog house
Even though his shelter may be prepared for winter, taking the extra steps to pick a spot that maximizes on the insulation of the dog house ensures that he reaps all of the rewards. First, the opening of the dog shelter should face a direction that doesn’t directly point into the wind.
Wind chill can be even colder than the surrounding temperatures, and the insulation will do no good if the wind is blowing directly into his home. If this proves to be difficult, you can cover the entrance of the shelter with scraps of carpeting, old bathmats, or plastic sheeting.
Secondly, choose a part of the yard that is not prone to flooding. When the ice and snow melts, the yard can become quite wet and swampy. Choosing elevated areas will ensure that he’s dry and avoid the inside of his shelter from becoming wet as well. With nowhere to be dry, your dog can have hypothermia set in very quickly if he is always wet and cold.
Thirdly, the dog shelter should be raised from the ground through the use of some kind of platform.

The flat inside surface of the shelter is in constant contact with the ground, which makes it quite easy for the inside of the dog house to become cold. Elevation from the ground causes the house to retain more heat, making it easier for your dog to stay warm.
Winterizing a dog house
If you already have a doghouse in place in your yard, then there are some extra purchases that you can make in order to help your dog stay warm during the winter.
Many doghouses that you can purchase at the store are already insulated for both cold and summer months, but it helps to go that extra step to maximize the comfort of your dog.

These options are cost-effective solutions that will protect the health of your dog and ensure that he is comfortable. They can also be switched around if your dog isn’t particular about any of the additions that are made.
Insulation
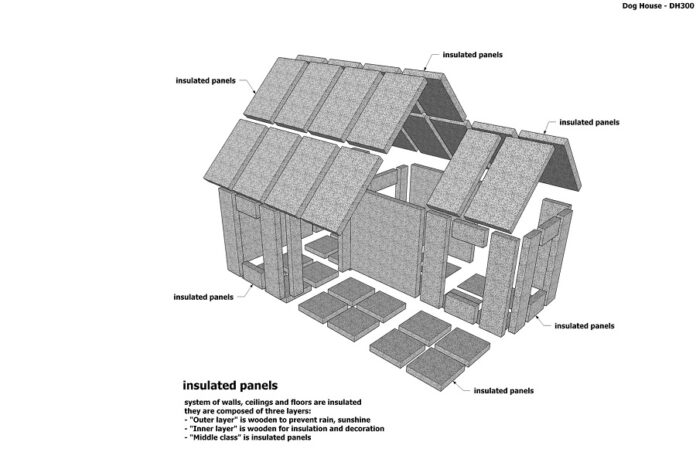
Many dog houses are already equipped with a variety of insulation materials, but you can always add your own. Check that the dog house that you’ve purchased has insulation in all parts of the shelter.
If not, then you’re probably going to have to add your own, especially in the floor. Styrofoam sheets or polystyrene foam can be used between the walls of the dog house, and make great insulating material.
Be sure to check your dog’s house for any holes or weak spots, as the last thing you need is for your dog to start using the insulation as his new chew toy. Not only will that undo all of your work, but it can also make your dog very sick.
Heating pads and units
If you worry that the insulation alone won’t be enough to keep your dog warm, then you can always choose to include heating pads or heating units within the dog shelter to help. Heating pads should be no bigger than the size of the shelter interior, and should not be left on at all times.
Doing so can leave your dog at risk for being burned or becoming dehydrated. Heating units can be added to warm the exterior of the house, which will radiate to within. If possible, you can put these devices on some kind of timer so that it only warms up when the dog needs it.
No matter which option you choose, it’s important that the cords be hidden from your dog in order to avoid the risk of chewing. An electrocuted dog should be the least of your worries during the winter season.
Bedding
Choosing bedding that’s cheap such as sheets and fabric bedding may seem like the easy option, but they’re not going to keep your dog warm if they get wet.
Lining the bottom of the shelter with straw and/or cedar shavings will do well to keep your dog both warm and dry. They’re quite cheap, and come in quite large bags, meaning that they can be used over and over again.
Be aware that you’re going to have to change the bedding on a regular basis – once every two to three weeks – in order to provide constantly clean and warm bedding for your dog.
Water
It’s easy for your dog’s water bowl to freeze during the winter, and he’s going to need a constant supply of fresh water during the day. You can choose to change his water every few hours, or you can splurge a little and decide to get a heated water bowl to prevent his water from freezing. These are easy to find in any pet store, and should not be placed in the middle of your dog’s bedding.
How to install styrofoam sheets
If you’re eager to learn how to place Styrofoam sheets of polystyrene insulation into your dog’s house, it’s a lot easier than you think. It will help to trap your dog’s heat within the dog house so that he can stay warm even on those really cold days.

These steps are best fit for a wooden dog house that is square.
- The first thing you’ll need to do is remove the front wall of the dog house. This gives you easy access to the inside so that you can measure everything properly. Using a measuring tape, measure the dimensions of the inside.
- The next step is to mark the dimensions into the panels of the insulation using a straight edge.
- The panels should then be cut out of the foam using a utility knife. This ensures that the edges are straight and will fit together when placed inside the dog house.
- The foam panels are then stapled to the outside of the dog house using a staple gun. The inside should be checked to make sure that the staples haven’t gone all the way through so that your dog won’t be injured.
- Another foam panel should be stapled to the front wall of your dog house. Laying the wall flat on the ground can make this a lot easier, and a hole should be cut in the shape of the entrance. In order to avoid rough edges, you should smooth them down with sandpaper.
- Once the front wall is reattached to your dog house, you should start cutting panels of 1/4-inch plywood in order to cover the foam. The panels should be at least three inches wider than the wall itself so that it can cover the corners of the foam.
- Using a staple gun, staple the plywood to the foam. You can paint if desired. Examine the areas between the walls, floor and ceiling of the dog house. If there are any gaps and/or cracks, then you can fill them using a caulk gun and caulk to keep the cold air from seeping in those these faults.
Building a dog heater out of a paint can
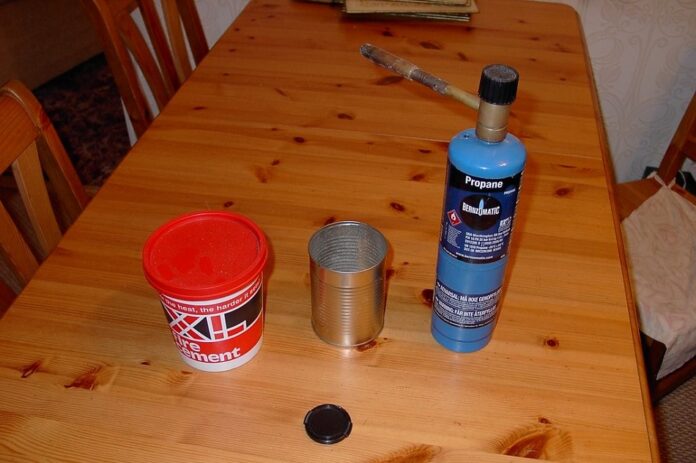
If you don’t want to spend the money to buy a heater for your dog’s house, you can build on yourself from a few simple materials. All you’ll need is
- one 100 watt flood light
- a paint can
- an extension cord
- a lamp base
- wire clamp
- a drill
- a hole saw equal or slightly larger than the hole in an electrical box
- jigsaw
- drill bits
- corner brackets
- screws and nuts
- 1/2-inch wood screws
- wire strippers
These materials will help to keep your dog’s house at roughly 60 degrees Fahrenheit during the winter.

Be aware that if you have no electrical experience, you may be putting your dog at risk if an electrical fire starts. Keep an eye on the house for a few hours after everything is installed to make sure that it is in working order.
- Using a marker, trace the outer lip of the pain can where you’d like to mount it in the dog house. Using a drill, drill a hole somewhere along the traced line. Use the jigsaw to cut along the traced line. Smooth done the frayed edges with a file or a saw.
- Use your hole saw to cut a hole in the center of the paint can. The hole should be bigger than your wire clamp. Align the center hole of the electrical box with the one drilled in the can and mark the holes for the electrical box on the outside of the can using a marker. Holes should be drilled to mount the box to the inside of the can using bolts and nuts. Washers can be used to lock them in place.
- Mount the wire clamp in the center hole with the clamping part facing out. Then remove the end of your extension cord that usually plugs into the wall. Strip each of the wires bare with wire strippers about half an inch down from the end.
- The stripped end of your cord should be strung through the wire clamp and pull it out through the open end of the can. Twist the end of your hot wire and bend it clockwise into a hook. This should be hooked around the brass screw on the back of the lamp base and tightened to it. The same should be done with the white wire and it should be hooked to the silver screw.
- Loosen one of the screws that are holding the electrical box in place and hook the green wire (the bare ground wire) around it, and tighten it in place. The lamp base should then be attached to the electrical box using the two screws that it came with.
- The corner brackets should be mounted on the outside of the can using the drilled holes and secured in place with the screws and bolts.
- Mount the lighting to the ceiling of the dog house using the wood screws and the other sides of the corner brackets. Screw in the light bulb to test. If it is not, then recheck step four to see that your wiring has been done correctly.
You can see how to make a paint can heater here:
And You must watch all the video in this articles, very useful stuff!
Building an insulating dog house from scratch
If you want to feel really accomplished and build your own dog house from scratch, then it’s quite easy to do if you have the right tools and a lot of patience.
You may require some help in the building process, as well as getting the parts that you’ll need to build the perfect, warm dog house for your dog.
This is a two-partition dog house, so that your dog has the choice of looking outside, or seeking shelter in a separate part of the house to sleep or relax.

The materials that you’ll need are 2x4s, 3/4-inch plywood, 1 1/2-inch thick foam, glue, staple gun, weather-resistant screws, circular saw and/or saber saw, a drill, piano hinge, tar paper, metal drip edge, hammer, roofing nails, roofing cement, and asphalt shingles.
- The first and most important step is to measure your dog. The dog house that you’ll want to build has to be big enough for your dog to turn around in, but small enough that it will retain his body heat and keep him warm. The measurements that you should use are:
- width: dog’s length + 12 inches
- length: dog’s length + 18 inches
- height at front: dog’s height + 9 inches
- height at back: dog’s height + 3 inches
- The dog house will be built with a sloping roof to promote rain runoff so that the roof is less prone to leaking.
- The second step is to get some 2x4s that have been pressure-treated. This means that they aren’t going to warp or splinter after extended outdoor use. However, be aware that such wood is bad for pets if there is skin contact, so these should always be covered in the final steps of the building process. The 2x4s should be cut to the dimensions taken earlier according to the width and length in order to build the base. The ends of the 2x4s should be butted together and affixed with screws that are weather-resistant.
- Cut a floor panel to fit over the 2x4s out of a piece of 3/4-inch plywood. Secure to the base of the dog house with weather-resistant screws.
- In order to cut the sides of the dog house, they’re going to have to match exactly, or you’re going to end up with a crooked roof and gaps between the roof and the wall. In order to cut identical angles, tape the two pieces of plywood together so that they’re secure. Using a clamp, secure a straight edge to the wood, and cut along the edge with a circular saw or saber saw. Now both sides of the dog house will have the same declining angle for the roof.
- The sides of the dog house should then be secured to the base using some more weather-resistant screws. Ensure that they are perpendicular to the base when they’re being attached so that the roof can be attached properly.
- Next, the corner braces need to be added in order to make the dog house sturdy. This also prevents drafts from occurring, so your dog can stay warm. Simply screw together two strips of plywood to create each brace. The corner braces should then be attached to each corner of the sides, front and back panels with weather-resistant screws.
- The next step is installing the partition wall. This is where most of your dog’s body heat will be trapped when he isn’t by the entrance, so that he can stay warm during the winter. The partition wall should be secured to the base, and a plywood panel that has been cut at the same angle as the sides should be attached to the partition.
- In order to maximize the heat-retaining ability of your dog’s home, insulation should be installed. Foam insulation can be cut to the dimensions of the walls of the dog’s home, and then covered with plywood in order to secure in place and prevent your dog from chewing on or eating it. The insulation can be attached using a staple gun or glue.
- Before installing the front wall onto the dog house, you’ll need to measure an opening for your dog. Using the measurements you took earlier, the height should be a few inches above your dog’s back, and the width should be your dog’s width plus 3 inches. The opening should be centered in the panel of wood and then cut out with a saber saw. The front wall can then be attached using corner braces and then sanding the edges smooth in order to prevent splinters and snagging on collars.
- When cutting the roof, make sure that it is longer and wider than the base. This ensure that the rain falls away from the perimeter of the dog house and won’t pool around the base. The roof is secured to the back wall of the shelter using a weather-resistant piano hinge. This makes it easy for you to get inside and do any necessary cleaning. Once in place, the roof is covered with tar paper and a metal drip edge is added around its perimeter.
- Lastly, the shingles are added to the roof to make it waterproof. The roofing nails should be long enough to attach them to the wood properly, but short enough that your dog can’t get at the sharp ends. Starting at the bottom edge of the roof, overlap the shingles on each row as you work your way to the top to create a waterproof seal. Roofing cement should be added to the top edge in order to seal out any moisture.
To build other kinds of insulated dog houses for winter, here are a few more tutorials:
When it comes to keeping your dog happy and healthy, it’s important that you also take the weather into account. It can be easy to forget that your dog can get cold because of the layer of fur he has on his body. However, by building or modifying an outdoor shelter that you already have, you can ensure that his body temperature is maintained, so that he won’t suffer the effects of hypothermia and/or frostbite.


